With the hearts in hand, our next destination is the Giant's Cradle that is directly east from the shores of Saint Centour. At the entrance, place the Blue Virtue on the left-side of the door, and the Red Malice in the right-hand slot to slide the ancient doors open.
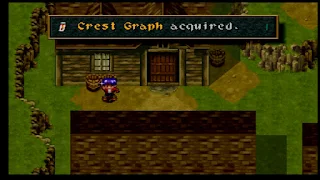
Within, take the left-hand path to a door (Will have a helmet-looking symbol above it) leading to two chests, containing Crest Graphs, and a save point. Then, take the right-side path's door. In the next room, have Jack use the narrow path above and Grapple the post to the southeast; if you use the one to the right, a spear trap will activate. Down the stairs, dash your way across the room past the spike and spears traps, and around the next open room to the helmet door.
A simple block-switch puzzle here. Push the block south, but leave enough room to get behind it. Then, push it to the right-side, even with the next narrow path up. Lastly, upward all the way, then get behind it from the left and push it over to the switch to open the stairwell. Down the stairs, push the block along the bottom-half of the extended area with the switch on it, leaving enough room to avoid the spikes, and to push it upwards onto the switch to lower the barrier. From there, cross another open room to the other side.
Dash ahead past the spear traps and you'll crash into a chest with a Potion Berry inside. More spears in the next area, but make sure to stop your dash before you run off the ledge at the bottom. There is one last spear to dodge before taking the south exit and around another large room.
Grab the crate from the right-side of the following room, and where Rudy is standing in the above screenshot, walk through and then up to even with the switch to avoid the spike traps. Once the crate connects with the crystal, the stairs down will open. You won't be able to entirely avoid the spikes in the next room; just grab the crate and quickly walk and throw it at the crystal at the end before the spikes get to you.
While passing through the room afterwards, snag two chests containing Magic Carrots on your way through. Then, dash quickly past the spear traps, but you'll, again, need to stop short of the pitfalls to make it to the stairs on the other side.
Grab one of the crates on either side and walk just a tad past the treasure chest containing a Potion Berry and throw it at the switch; avoiding walking into the spear trap just beyond.
In the final large room, you'll find a golem that was specifically created to fight the demons, but it seems inactive. The party will suggest we return to Adlehyde and consult with Professor Emma about it.
Emma, along with help from Hanpan, will thoroughly examine the golem. It's alive, but sleeping. That night, Cecilia will share her thoughts with the Earth Golem, whom appears to understand and connect with her. It doesn't want to awaken to only be used as a weapon like in the past.
Cecilia's heart will awaken the Earth Golem to fight once more, not as a weapon, but as a shield for Cecilia and Filgaia. It will rise to the top of the Giant's Cradle and lumber outside; now yours to command. Emma will return to Adlehyde and you can use the Earth Golem to cross over the shallow waters that connect the lands.
To the southwest, across the shallow waters, you can find a small piece of land with a caravan on it. Here you can buy a multitude of status ailment accessories. You should have at least one of these already, but if you want to be extra careful and can spare the Gella, buy one more of each. Back towards the Giant's Cradle, stomp your way east to the snowy lands of Arctica.
There are no random encounters while inside the Earth Golem, but if you're brave, you can exit and attempt to face-off against some of the creatures on the tundra. If you encounter a Stormdrake, Jack can steal a Thunder Ring from them, but just like with the Sand Beasts near Port Timney, be prepared for this to take a while to acquire. In the next town you can buy elemental rings, also, if you don't mind parting with the Gella. Besides Stormdrakes, be wary of the pair of Funbabas you can encounter, as well. These are serious encounters if you aren't at least over level 30. You'll pass by the currently-inaccessible demon stronghold, the Photosphere, heading southeast across another set of shallows to the small village of Court Seim.
From the entrance of the village, head east and north between the inn and the orphanage. Pass the well to the east and look for a Mystic Apple in a barrel between a house and the item shop.
Inside the item shop, all of the elemental rings in the game are for sale. If you've been using Trickster a lot, you should have Flame, Wind, and Thunder Rings already and will have the opportunity to get the Aqua, Holy, and Demon Rings later on. The only ring you need to purchase is the Geo Ring, it cannot be found anywhere else in the game. When you equip these rings, they grant the character the specific element to a character's basic attack, and will reduce the damage of such attacks on them. Cecilia can use these rings to cast their respective element's basic spell; with the Holy and Demon Rings casting Saint and Darkness, which you can not yet obtain.
From the item shop, walk northwest and climb the stairs to a solitary house on a hill. Inside is a barrel containing a Power Apple.
Continue west and cross the bridge, pass by the magic guild, and you can take a Crest Graph out of a barrel in the last house before the edge of town.
Make your way north, up another set of stairs, to the giant mansion overlooking the town. Search a barrel on the left-side of the house for an Agile Apple.
Inside the mansion, take the first door to the left and descend the steps to the basement. Pluck the Hardy Apple from the barrel and talk with Nicholi, the ARMs meister.
Nicholi just so happens to have been a disciple of Rudy's grandfather, Zepet. You'll see flashbacks of Rudy's past with his grandfather, including his death, and Rudy's setting out to be a Dream Chaser, all alone. Nicholi will give Rudy a Wind-up Key to enter the Epitaph of the Sea Wind, where Zepet use to do all of his research. Calamity Jane will then enter the basement, and if you haven't already figured it out from talking to the townspeople, she supports the orphanage through her treasure hunting. She's concerned you told her father, Nicholi, about her life as a bounty hunter. Anyway, with the Wind-up Key in hand, we can climb back on the Earth Golem and cross the shallows to the east for our next dungeon: Epitaph of the Sea Wind.
Outside on the Court Seim world map, there are a multitude of new enemies. Jack can reliably steal Revive Fruits from the trio of Salamandras, and since you can never purchase these, I recommend using this chance to stock up on them for later. Stormdrakes show up here if you want to attempt to steal a Thunder Ring. Gremlins, from the Tripillar, make an appearance here, as well, and they both steal and drop Bullet Clips. Geldams, also from the Tripillar, have Potion Berries to steal. Griffins, a relative to the Sand Beast, have Wind Rings to pilfer. Lastly, if you need more Magic Carrots, Haborims carry them to steal. As you can tell, this is an excellent area to farm items before you enter the Epitaph of the Sea Wind. You will find some of these enemies inside the dungeon, also.
Inside the Epitaph, approach the strange-looking device and use the Wind-up Key on it to have it putter out of the way and allow you to work your way around to climb the stairs up.
Here, ride the conveyor belt twice to be let off next to a Potion Berry treasure, then Rudy can Bomb a cracked wall to the south that leads you onward.
Walk along the belt to the left-side to pick up a Lucky Card in a chest, then step on the belt to take you along to another chest with a Magic Carrot. Take the belt to the left of the chest and ride it to a switch that opens a door to the south. Use the belt to the right-side of the Magic Carrot chest to take you back to the previous stairs and you can walk around the right-side to find the now-open stairwell.
Luceid, the Guardian of Desire, will appear on the next floor. Have Cecilia slap her in the head with the Wand and dash after her as she makes her way around the room to the door to the north. Whack her again with the Wand and you can proceed to the next floor.
You'll come across a save point, then make your way to the bottom-right of the area and throw Hanpan under the small crack in the wall to activate the switch, opening the door. Use Hanpan, again, on the yellowish chest to obtain the Metal Bird item and reveal another switch to step on.
Enter the bottom-left corner room to take a Mystic and Agile Apple inside treasure chests, then examine the machine to the north. You'll need to enter a password...If you check the description (Triangle) on the Metal Bird item in your menu, it will reveal that it is, in fact, the password we are looking for. Enter "Metal Bird" and a bookcase in the upper-right corner of the area will move aside to a secret staircase.
If you search the bookcase that moved, the party will find an "Erotica" book. While it is no concern to us, this is where the Wild Arms series later began its tradition of fighting Adult Mags.
Ascending the staircase, you'll encounter another Duplicator door. Use the lone Duplicator you should have in your inventory to snatch a Bullet Clip, Secret Sign, and Crest Graph from the chests.
Continue south and into the room to find a pair of Skates lying on a table for Rudy. This tool will allow Rudy, while avoiding random encounters, to speed past damage tiles and conveyor belts that are going the opposite way. Unfortunately, Rudy cannot stop until he hits a wall, though. Make your way back to the save point, making sure to save, then use the Skates to power past the belt to the south where a Full Revive item is waiting.
Climb the ladder to the outside of the Epitaph and claim the Reflex shield on the backside. This is a new Rudy-only accessory he should swap out for his Round Shield, if you are using them. You cannot acquire more than one Reflex, so make sure to hold on to it.
In the following room, use the Wind-up Key to activate all three machines. When you attempt to exit, an explosion will occur that gives Jack a new fast draw hint for Blast Charge. This is a unique skill in that it needs to be focused on the center enemy, assuming it has one to its left or right. The focused enemy will receive a large amount of damage while those around it will receive damage, as well, but much smaller amounts (Think: Blade Beam from FFVII). Once you have Blast Charge, climb the stairs and approach the treasure at the top of the Epitaph for a boss fight.
You need to take this boss seriously; it is way harder than any boss thus far in the game. It's essential that Cecilia casts Shield on everyone, but herself first, then focus your attacks on Luceid; although the battle will end if Boomerang is defeated first. With Shield in place, use a Lucky Card, have Cecilia stand by to either cast Heal or Mystic a Potion Berry for the party, while Rudy uses Rocket Launcher and Jack with Meteor Dive on Luceid. For emergency healing, have Jack use Accelerator combined with Heal Blade. If Cecilia has a free turn, she can cast Armor Down. Both of the bosses hit extremely hard, so it's just a matter of playing defense and chipping away at their HP. Once Luceid falls, the battle becomes much more manageable. When defeated, they will disappear and you can take the Rune Drive from the chest and cast Escape.
We're not finished here, though. Now in possession of the Skates tool, from the entrance, take the stairs to the west. Place yourself perfectly at the center of the conveyor belt and use the Skates; if you aren't positioned correctly, you will crash into the chests and back onto the belt. When successful, plunder the chests for a Duplicator and an Amulet accessory. The Amulet, which is one-of-a-kind, regenerates HP during battle and while walking in the field. I recommend you switch this out with Cecilia's Mystic Word, if you were using that like I was. Now, return to Nicholi in Court Seim with the Rune Drive.


