If you sail south and then a bit east from Court Seim, you will come across a small island with a cave. This is our next destination to continue with the story: the Wandering Isle.
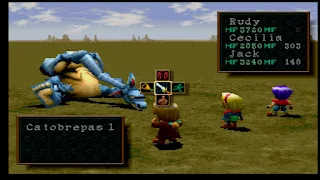
A minor note, but outside the Wandering Isle, only on the limited amount of land nearby, you can encounter the Catobrepas.. It's not special in any way, but is often missed due to its being limited to this small region.
The Wandering Isle is a kind of mini-dungeon that passes onward to our actual location. The first part is fairly linear, just keep following the path north until you find Grapple posts Jack needs to use to advance through the area. In this strange, purplish realm (?) the party will frequently encounter the Wyvern monster. Because of its high Parry, you'll need to use skills to defeat it, but it will net you 4000 EXP per battle; although very little Gella. I recommend having Jack using Psycho Crack to confuse it as the Wyvern employs the Death Wing attack that attempts to cause instant-death on the party.
In the next cave area, that is linear like the last, you'll encounter DieFighters. Jack can steal Round Shields from them. This Rudy-only accessory is outdated, but for item collectors, this is the only place in the game you can obtain more than one of them.
The next series of Grapple post islands you arrive at can be a bit confusing and contain treasure chests. From the start have Jack Grapple: north, west, southwest, west, and throw Hanpan across the divide to acquire the Sioux Poncho armor for Jack, which you should switch out for his current Blue Wind. It is also a one-of-a-kind armor, so don't sell it later on.
Use Cecilia's Pocket Watch to return to the start of the area and this time use the Grappling Hook: north, north, west, north, east, then use Hanpan to access the chest containing a Crest Graph. Return west, then west again, and Hanpan can snatch a Red Jacket for Rudy that you can exchange for the Cross Cloak he should be currently equipped with. Like the Sioux Poncho, you can never obtain more than one Red Jacket. Have Jack Grapple northeast and Hanpan can reach another chest with a Magic Carrot inside. From there, Grapple: northeast, north, northwest, west, then into another cave that contains a save point and the exit back out to the world map on the west-side. On the world map, you can head south, then west across a forest, to find another Isolated Guild, but there is nothing to be had there except for consuming the magician's potion to restore your party. Use the Ocarina to summon the Earth Golem and cross the lake to our next dungeon: the Dead Sanctuary.
At the start of the dungeon, use Cecilia's Vase tool to extinguish the fires and head through the exit to the north. You'll encounter the Kelbim enemy frequently inside the Dead Sanctuary, and if you didn't buy one earlier, Jack can steal a Holy Ring, although rarely, from them. In the next room, only the eastern path is accessible by pushing the silver statue forward.
You'll enter an area with three statues and a pressure plate in the center in the following room. Move the right-most statue out of the way, but not onto the pressure plate, and Bomb the wall behind the statue to the north. Extinguish the flames here with the Vase and push the statue to the north and onto the plate.
Back in the center room, push the left-most statue out of the way and take the southern exit to a chest containing a Wise Slate accessory. When equipped, this will boost a character's maximum MP by 25%. You may consider this for Jack over the Gauntlet, but I am sticking with the latter, for now. To note, there is only one of these accessories in the game. Head back into the previous room and this time push the left statue onto the pressure plate to open the right-side door you can now exit through.
In the next room, there are Mystic Apple treasure chests on both sides of the room and an exit to the north.
To the north, you'll enter a large room that has several branches. Take your first left and follow it around to access a chest with an Elder Scroll. Another one-of-a-kind item, this Cecilia-only accessory should be swapped out with the Secret Book, if she is currently using it. If you're like me, and have the Amulet equipped, this makes for another tough decision. I'm staying with the Amulet, but the Elder Scroll's large boost in Sorcery is hard to pass on. Return the way you came and take the right-side path this time, followed by going south at the intersection to a set of stairs and a treasure chest containing a Crest Graph. Go back to the intersection, and this time, proceed north, then to the left along the wall. At the southern end of the path, the party can read a plaque about the Guardians that will provide a hint to a puzzle lying further within, while continuing to the east to find a stairwell downward.
The following two floors are much the same; there are plaques you can read at the southern end of the rooms that pertain to an upcoming puzzle, and another stairwell on the opposite end to continue on, but nothing else of interest besides new enemies. The Niebass enemy you can pilfer for Goat Doll accessories, which you will be able to purchase later, but this may be of interest some some players. Also, the Ukobacks have Flame Rings, which are much more commonly stolen from than previous monsters.
In the room past the plaque floors, you can find two chests with Mystic Apples inside on the right-side of the room and then exit north to a maze-like area with multiple doors. Choose the middle door, middle, left, then middle one more time to exit out to another puzzle.
Work your way around the room and down the stairs on the left-side to find a save point and a treasure chest with a Lunar Rod for Cecilia inside that is stronger than the current Crest Wand. When combined with Mystic, the Lunar Rod will cast the Valkyrie spell; it is also the only one you will find in the game. Make sure to save and prepare for a boss fight in the next room. Have Cecilia unseal the door with the Tear Drop and head inside...
In my opinion, access to the Hi-Shield spell really makes a lot of the upcoming bosses far too easy and the Boomerang/Luceid combo is one of them. Cast Hi-Shield twice and their physical damage will be easily minimized; of course, keep an eye on Cecilia's HP if she doesn't have the Amulet equipped. Focus on eliminating Luceid first, with Rudy using either the Rocket Launcher or Twin Orbs and Jack with Meteor Dive or Slash Rave depending on their Luck statuses. If you want, have Cecilia cast Hyper on Jack and Armor/Slow Down on the duo if need be while casting Remedy to heal.
Before leaving, enter the door to the north for Jack to undergo another fast draw test from a statue. Defeat the enemy to obtain the fast draw skill Shadow Bind.
Shadow Bind appears to be a terrible; attempting to paralyze a group of enemies, if you're really lucky, for more than one turn. However, if you use Dark Bind on a paralyzed enemy, assuming that the skill would inflict a second paralysis status, Jack will use the Dark Sweep attack instead which deals MASSIVE damage. Unfortunately, like I stated, the paralysis status is generally gone the following turn after inducing it, so chances to use it are few and far between. Moving on, Escape from the Dead Sanctuary and I recommend visiting the nearby Isolated Guild to bind the two Crest Graphs we have in our inventory. I'm selecting: Hi-Break (Black: Geo-Geo) and Hi-Vortex (Black: Wing-Wing). Afterward, Teleport to Milama Village to continue.
If you were collecting item bottles earlier, you likely saw the tiny island the Demon's Lab dungeon inhabits. If not, sail from the shores of Milama northwest, sticking near the continent, and you will find the solitary island.
The only monster you can find on this island is the Stoker, and if you're in need of Gella, this is easily the best place, for the moment. Not only does this trio award you with 4500 Gella, but you can easily use Trickster to steal Cross Cloaks and hawk them for an additional 4600.
Entering the Demon's Lab, you'll get a scene between Lady Harken, who is questioning her relation to Jack, and Alhazad. When it's over, head north and, like the Photosphere, you'll need to Bomb both generators on both sides of the door to disable the red panels. Continue down a stairwell and the elevator that follows. Try not to exhaust your MP and Rudy's bullets here, as not only is there a boss here, but there will be a follow-up dungeon immediately after you will be unable to leave and no way to rest in between.
The Witch Doctor's you encounter inside should be targeted quickly as their "Human Experimentation" attack inflicts a myriad of status effects on a character. If you didn't buy one earlier, you can also steal Demon Rings from them.
The skull-like Galganchers Jack can steal a former helmet for Rudy, the Metal Band. While obsolete now, for item collectors, this is the only place in the game you can obtain more than one.
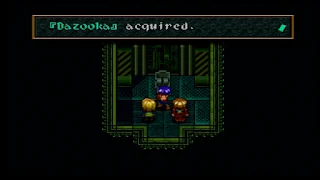
Off the elevator, proceed north, and then down a ladder and into the next area to find the Bazooka ARM for Rudy. While considerably stronger against groups than the Prism Ray, the Bazooka is also fire elemental so keep that in mind before using it. Climb back up the ladder and you'll find a Revive Fruit treasure on the opposite side of the room, then you can exit south to another elevator.
You'll then enter a room with three exits. To the left are two treasure chests containing a one-of-a-kind Energy Saber for Rudy, that is better than the current Hybrid Sword and a Potion Berry. The door to the right has three chests to plunder with two Potion Berries and a Mega Berry. The middle door takes you to a save point and one last elevator to descend.
You'll need a passcode for the large door in the center of the room. There are two rooms on either side of the central door you can enter and battle a Witch Doctor for access to the terminals; one of which has the passcode for the door. Before entering the code "Demon Gate", try to get Jack's Luck status to "Best" and proceed further in to face-off with Lady Harken yet again.
Harken is even simpler than Boomerang and Luceid. Cast Hi-Shield either once, or twice, depending on how much damage she is inflicting, then Slow and Armor Down on her. Have Jack attempt to steal a Secret Sign and then Slash Rave afterwards, with Rudy using the Rocket Launcher. When defeated, Alhazad will take her and the Darkness Tear away, beckoning the group to come for him if they want them. Jack, knowing the true identify of Harken now, will learn the fast draw, Magnum Fang. Magnum Fang is one of the best all-around skills Jack can acquire in the game. Later skills will be stronger, but gimmicky, while Magnum Fang's damage will always stay consistent and dependable.
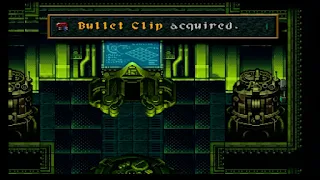
Before leaving, there are two semi-hidden treasure chests containing Bullet Clips on the opposite sides of the terminal, behind the machines. Cast Escape or attempt to walk out of the Demon's Lab and Zeikfried will then abduct the group, assuming you have completed both the Demon's Lab and Dead Sanctuary.
The party will be forced to battle three Amplifiers in between dimensions. While not a boss, have Cecilia immediately cast Lock State to protect the party from their status effects. When the battle is over, the party will be inside the demon's Gate Generator. In the first room, there is a save point and three chests with two Magic Carrots and a Bullet Clip to find. The Gate Generator is another one-time dungeon, so like always, be vigilant in emptying the area of all treasure or you will not have another chance to do so. Enemies inside the Gate Generator not only give a fantastic amount of EXP, but drop Magic Carrots and Bullet Clips frequently, and you can steal Sunglasses from the giant Fankelvines.
From the start, climb the right-side stairs and exit south, following the path to the west, then north to two exits; one being locked. Climb down the stairs to the left and find a Heal Berry inside a chest further on. Interestingly enough, you can actually walk through the wall directly south of the chest and fall into a pit. If you're careful, you can even walk around to the left and right-sides before eventually succumbing to more pitfalls. Not sure if this is a glitch, or what, but I've thoroughly explored and there doesn't seem to be anything there. Return the way you came and Zed will appear and destroy the floor, but you can easily use the Grappling Hook on him to pull yourself back over to his side. Follow him, and he'll have unlocked the previously-sealed door and you can ascend a set of stairs to the next area.
Zed will pull a lever, electrifying the floors, but Rudy can use the Skates tool to speed past them. In the next room, take the exit to the north and pull the lever that Zed had used to deactivate the floors.
Back out to the four-way divide, take the exit to the south. Wrap around to the southeast and pull the lever to reveal a Grapple post, then make your way back and take the southern path and pull the lever there to unlock the door to the west, but also raise a barrier behind you. Simply have Jack pull himself over to the Grapple post and you can poach the chests containing a Secret Sign, Crest Graph, and Bullet Clip.
At the four-way, take the right-side path and descend the steps on the other side. Enter the first door to find three more treasures with two Potion Berries and a Force Unit accessory inside. The Force Unit is one of the best accessories in the game, allowing the character to build Force quicker. Once Rudy receives his level 4 Force ability, I will be equipping him with this, but for now, I recommend it for Jack.
Climbing the stairs to the left and exiting south, you'll encounter Zed again. You'll see him activate a secret switch and can open a Nectar treasure to the south. Around the corner, search the location in the screenshot above to pull the secret lever and open a door to the right. Follow the linear path to a room containing multiple doors and switches. You need to flip the first, second, and third switches, but before activating the fourth one, return to the second switch and use it to close the door to the third switch. Once you flip the fourth lever, you'll foil Zed who will attempt to come in and use the third switch to lock you inside. If this happens, you'll need to use Cecilia's Pocket Watch to reset. Continue to follow Zed out of the room to a save point and the first of two bosses waiting in the next room.
Hi-Shield makes this another easy boss. Cast it twice, and you may consider casting Protect on Rudy, followed up by casting Armor Down. Diablo is, predictably, weak against water, so Hi-Freeze will take a chunk out of his HP each time. If you High Guardian the Triton Rune, it did 9999 damage for me, also. Jack should use his new Magnum Fang while Rudy sticks with the Rocket Launcher. Having defeated a golem, Zed will flee north, where you can enter any passcode you want to advance, and then into the central room where Zeikfried is waiting.
Zeik is a lot tougher than any of the previous few bosses you've faced, so don't get complacent. Negative Rainbow, a magical attack, will take a large swath out of your HP, so I recommend casting Protect on both Rudy and Jack first, then Hi-Shield, followed with Slow Down. Even with that, you may need to cast Remedy after every Negative Rainbow. Have Rudy use his Rocket Launcher and Jack stick with Magnum Fang as your major source of damage. If Cecilia has a free turn, cast Hyper on Jack to double his damage output.
Having lost, Zeikfried will attempt to open a black hole inside the Gate Generator to send everyone to their demise. He will latch himself onto Rudy, so they can't escape, but Rudy will sacrifice himself and cut off his own arm to send Zeik into the dimensions beyond.
The party will, unfortunately, be stuck between dimensions, drifting aimlessly, but the Tear Drop and Guardians will intercede and place them safely in the vicinity of Adlehyde. Cecilia and Jack then learn the truth about Rudy: he is a machine, possessing a metal body like the demons, but is much more human, being man-made. Devoted to their friend, they depart for Adlehyde in hopes that Emma can help him.


