In Adlehyde, Cecilia and Jack rush Rudy to Emma's, but there is little she can do for the material that Rudy is made out of. Jack will suggest going to see Mariel in Rosetta Town and maybe her herbs can be of some help. Even with Rudy no longer in your party, the world hasn't changed much. The villagers of Surf still won't deal with Dream Chasers; Rudy or not. You can, however, visit the various ARMs meisters around the world and they will be snarky with you about having no one that can use ARMs.
Make your way to Rosetta Town and see Mariel in her solitary hut. She can't help Rudy with herbs; and it's unlikely anyone can but the ancient Elws from 1000 years ago. However, because of Rudy's kindness, she may have an idea and asks you to visit the Forest Mound south of the village. At the northern end, Mariel will explain that this place acts as a gateway between Filgaia and the Elw Dimension, which is Filgaia from 1000 years ago. The portal can only be opened with the blood of an Elw though, so Mariel will shed her own blood to open the gate for the party.
In the Elw Dimension, Mariel is bleeding badly and needs helps. The Forest Mound here is quite large compared to the current Filgaia and there are many paths to choose from. After teleporting in, head south and down into a clearing, south again past a clearning with two rocks, and in the next clearing, move west, but only halfway through the trees. Halfway in, turn north, west, then north again to reach two treasure chests with Crest Graphs.
To make things easier, use Cecilia's Pocket Watch to return to the entrance. From the first clearing: south to the clearing with the two rocks, east through the trees, and continue south three times to find a chest containing a Full Libra accessory. This is a really nice accessory that prevents all status ailments and Cecilia can also combine it with Mystic to cure any negative status. When you have it, return north once, west, then south to reach the exit where you will be met by a group of Elws. They seem to know Mariel and aren't pleased with her having brought humans through the gate. They decide to take you to the Elw leader to decide what to do with you.
Putting Rudy and Mariel down to rest, the Elw leader, Emiko (A familiar name), will talk candidly with Cecilia and Jack about the situation. Others like Rudy ultimately became killing machines, with Rudy being the last of his kind. Thankfully, Zepet managed to steal Rudy away and raise him to have a pure heart rather than one only knowing violence. Unfortunately, the Elws have lost the technology to help him. A wounded Mariel will then come down the stairs and suggest that we use the Guardian Blade to save Rudy; the same one that destroyed half of the current Filgaia. Her brother, Vassim, being the culprit of the incident, has isolated himself away from the other Elws because of it, but he and the Guardian Blade may be Rudy's only hope.
After the conversation with Emiko, the party will be left to explore Tarjon Village: the final town in the game. Still inside Emiko's house, on the second floor, search the barrels in the lower-left corner for a Magic Carrot before leaving.
Outside Emiko's house, search the lone barrel on the front left-side for an Agile Apple. To the right of his house, hanging on a tree is a...sloth (?) that functions like Filgaia's Memory Birds.
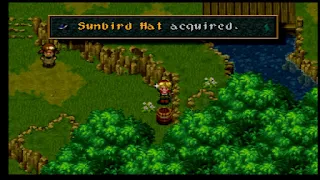
Down the steps from the house, in the lone barrel to the right of the village's exit, you can find a Sunbird Hat for Jack. Swap this out with his current Lone Wolf as it is the second-best helmet in the game for him. It's also a one-of-a-kind item you won't find anywhere else.
East from there, enter the lone building and you can pluck a Blue Ribbon helmet from a barrel. This is also Cecilia's second-best helmet and should be exchanged for her Silver Band. Mystic can be used with the Blue Ribbon to cast the Hi-Reflect spell, and like the Sunbird Hat, you can only obtain one of them.
Head northwest from Emiko's house, crossing a garden, then a bridge, and you will find a Mega Berry in a barrel out front of the nearby house.
If you swat the squirrel (?) behind the house with Cecilia's Wand, it will mention "The Abyss". Sounds like fun.
From there, head east, across another bridge, then south to another house. Search the right-side barrels to obtain a Mystic Apple.
Inside the house are four identical-looking old guys; this, of course, means they are wise (Crescent Lake, anyone?). Talk with the one to the top-left and he will give you a Spirit Key item to unseal the Life Guardian, Odoryuk, within the Forest Prison. This is required to save Rudy, so don't miss it. That's all for Tarjon Village, we can now exit out to the world map south of Emiko's house.
You'll be out on a much different-looking world map than Filgaia, covered in lush green and blue lakes. You can use both the Magic Map and cast Teleport here, but there won't be a whole lot of use for it, but it's worth noting. Our destination is the Forest Prison to the southwest of Tarjon. If you need to, you can return north to the Forest Mount and warp back to Filgaia.
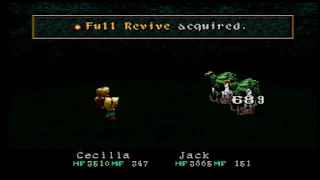
The Forest Prison looks confusing, and to an extent, is, but it's not nearly as bad as it appears to be. I also wouldn't recommend fighting too much, as you don't want to create a huge discrepancy between Cecilia/Jack and Rudy's levels. However, anytime you encounter the Alfase enemy, attempt to steal with Trickster. They carry the extremely valuable Full Revive item and will be indispensable going forward. From the Tarjon entrance of the Forest Prison, head east, south, then south once more.
Take the western path, then south, procure the Crest Graph inside the chest, then back north.
From there: west, south twice, grab another Crest Graph treasure, ignoring the broken bridge, and return north.
Take the path: west three times, grab the Mirage Coat armor for Cecilia to replace her Shining Cape, then south. The Mirage Coat casts the spell Quick when combined with the Mystic Force and is the only one you will ever find, so don't sell it.
Take the east path and there is, yet another, Crest Graph treasure at a dead-end, so return the way you came.
From the 4-way, take the western path this time, passing the broken bridge you saw earlier, and grab the Prairie Coat treasure chest. This is for Jack and is better than the Sioux Poncho he should currently have equipped; it is also a one-of-a-kind item.
Move south from the Prairie Coat screen, and then east to take the Warrior Vest from the chest here and back the way you came. The Warrior Vest is for when Rudy returns and is another item you will only find one of.
Take the western exit to find your fourth Crest Graph treasure, then, back to the 4-way. South, this time, south again, west, south, down the stairs, then west.
You'll see a giant gold and purple treasure chest, but pass it for the moment, and exit north to the last Crest Graph treasure of the dungeon and a save point.
Now, in the previous room, use the Spirit Key on the large chest to release the Guardian. Follow it east, then east again through a newly-created path, and north to a spring. Odoryuk will restore your HP & MP and give you his Life Rune. Obtaining the Life Rune is key to saving Rudy, so don't leave the Prison without it. I recommend switching Jack's Ice Rune with the Life Rune; not only are its stats great for Jack, but will also make him a second healer with Guardian Summon. When Odryuk is summoned, it restores a large amount of HP to the party, as well as their status, and when High Summoned with Cecilia, it has the ability to revive along with healing. Now, to exit the Forest Prison, from the spring, make your way south, south, west, and follow the next couple of screens south to be back out on the world map. You'll find Vassim's Lab southeast, across the large bridge.
Oh yeah, what was this thing?
At the front of Vassim's house, walk around the left-side, past the stack of firewood, and take the Mega Berry out of the barrel. A little further in, make note of the large crate we will need Rudy to Bomb later.
Upstairs, the first barrel you see has Rudy's second-best helmet, the Hyper Gear inside. Like the previous two helmets, it is also one-of-a-kind. Then, take the Magic Carrot out of the barrel to the southwest of the stairs, descend them again, and talk with Vassim.
Mariel manages to convince Vassim to use the Guardian Blade for creation and not destruction, but in order to do so, he needs the power of both the Life and Illusion Guardians. Thankfully, we picked up the Life Guardian from the Forest Prison, but the Illusion Guardian is within a book called "De Le Metalica" that could literally be anywhere in the world. Mariel suggests that it could be found in a library that contains every magic book ever written. Have we been to any large libraries before? Exit Vassim's Lab and use Cecilia's Teleport to return to the Forest Mound and back to the current Filgaia.
With 8 Crest Graphs sitting in our inventory, let's stop by Adlehyde and bind them before proceeding. I went ahead and binded the last-remaining simple magic spells, being:
- Air Screen (White: Wing-Muse): Increases evasion rate.
- Rage (White: Fray-Wing): Raises a character's stats +10%, but can only physically attack.
- Sleep (Black: Geo-Wing): Puts a group to sleep.
- Silence (Black: Wing-Fray): Prevents a group from casting magic.
- Flash (Black: Fray-Geo): Lowers all enemy's evasion rate to 0.
- Confusion (Black: Fray-Wing): Confuses an enemy.
And then, used the remaining two Crests on the advanced spells Hi-Prison (Black: Muse-Wing), which is more effective than the basic Prison and hits multiple enemies, and Banish (Black: Muse-Geo), that attempts to lower an enemy's statistics.
To find the book "De Le Metalica" we need to head for the Curan Abbey and to the Sealed Library. If you don't recall how to get there, you use Cecilia's Tear Drop near the symbol on the back wall of the Abbey. Inside, proceed to the very end of the dungeon, where Cecilia's fought a boss and met the Guardian Stoldark, and examine the bookshelf on the left-side to be swept off to the next dungeon.
De Le Metalica is another one-time dungeon you can never return to, so it is absolutely crucial you acquire everything here before leaving. Of most importance is the Necronomicon enemy that drops the best book accessory for Cecilia, also named Necronomicon. This is the ONLY place in the game you can acquire it, so if you don't get it here, it is gone for the remainder of the game. I promise that you don't want to pass this up: it boosts Cecilia's Sorcery to ridiculous levels and I recommend equipping this to her as soon as possible; even over the excellent Talisman. You can use Prison or Hi-Prison to set the Necronomicon up for Lucky Shot, that guarantees a drop, but Cecilia's Sorcery will need to be high and some patience required. Also, for note, the Necronomicon lookalike, Talguim, Jack can steal the Memoirs Pen accessory from if you have yet to purchase one.
Most of De Le Metalica is fairly linear, however, at certain points, doors will become locked behind you, meaning that if you forget to pick something up, you will be unable to return. From the start, follow the paths until someone locks the door behind you. If you examine the door above, it will tell you that a certain number of hours have passed. The trick to open the door is to move around the room, counterclockwise, and each revolution you make past the door, the hour goes down by one, then, when the hours reach zero, the door opens.
In the next room, grab the Earth book (Not an actual item) and use the door in the southeast corner. There is a Water and Fire book in the following room; and make absolutely sure you have grabbed these two, plus the Earth book, because once you exit through the eastern door, it will lock behind you.
Moving on, you'll come across a save point, then a locked door and monument ushering in one of the most notorious puzzles ever in an RPG. Don't bother to try to rationalize it, just follow along. Enter the door to the far-north and examine the bookcases, then, take the door to the south to find a line of treasure chests. From the left, open chests 3 and 4, leaving the others unopened; this will unlock the door in the previous room by the monument.
The next couple of rooms are linear, but make sure to pick up both the Wind and Lightning books as you proceed through. You'll eventually reach a room with three more books inside. After searching these three, along with having picked up the previous five books, Jack will get the inspiration for the fast draw Phazer Zapp. Hopefully you didn't miss any of the previous books, because if so, the doors are locked behind you and cannot return to get them, meaning that Phazer Zapp is completely missable. Phazer Zapp, itself, is not very useful due to it being similar to the Rainbow spell and attempting to use all seven elements against an enemy at once. Which, if an enemy is strong against any of those elements, will severely limit its effectiveness. However, you can sidestep this and focus Phazer Zapp into a singe element by equipping Jack with an elemental ring. For example: if you give Jack the Geo Ring, Phazer Zapp becomes entirely earth elemental allowing you to use this skill to target an enemy's weakness.
Continuing onward, you'll encounter a monument that presents a door puzzle to you. The answers are mostly obviously, but take the left door, right, right, left, and right door to reach the next area.
In the next room is the only place in the entire game you can encounter the MysticsPot monster. You can steal Nectars from them, which they also will drop, but will attempt to flee when their turn comes. Trickster proves to be not so useful, so I suggest having Cecilia cast Hi-Prison at the beginning of the battle in hopes of capturing one, then following up with Lucky Shot so they will drop a Nectar. You also receive a nice batch of Gella for each one you defeat.
Before you reach the bottom of this area, make ABSOLUTELY sure you have at least one Necronomicon; this is your last chance. When you reach the circle, the Illusion Guardian, Duras Drum, will appear and present you with the Hades Rune, and you automatically are teleported back to the Sealed Library. When combined with the Summon Guardian Force, the Hades Rune deals a heavy amount of Evil damage. Cast Escape and with both Life and Illusion Guardians, we can return to Vassim to save Rudy.
Vassim and Mariel are in the basement of his Lab preparing for Rudy's
operation. Using the newly-forged Guardian Blade, the surgery is a
success, but when Cecilia checks on Rudy, she finds that he has hidden
himself away in his subconscious with the pleasant memories of his
grandfather. Cecilia will watch painful memories of Rudy's past, but
encourage him not to give up and that his friends and Filgaia need him.
The figure of Zepet will then change into a dream demon in a battle for Rudy's heart.
Elizabeth (Sister of Beatrice, maybe?) is easily defeated by exploiting her weakness to Holy. First, have Cecilia cast Suction, then Shield, followed by casting Saint for huge damage; especially with the Necronomicon. If inflicted with Flash, just ignore it, and cast Hi-Heal every few rounds and this will be over fairly pain-free. If you really want to do some crippling damage, switch Cecilia's rune to the Saint Rune and High Summon with it for an easy 9999 w/Necronomicon.
With the dream demon gone, Cecilia will embrace Rudy as the battle for his heart continues. Suddenly, the Goddess Idol will shatter and the Guardian of Love, Raftina, will appear. The love in Cecilia's heart has awakened her and she presents the Love Rune to her; arguably the best rune in the entire game. A basic Guardian Summon of Raftina will heal the entire party, but not status effects like Odryuk, however, when High Summon is used, it not only heals, but also heavily damages the opposition with a non-elemental attack.
The next morning, Cecilia will awaken, with Rudy have fully recovered. Jack will come upstairs and the trio will be reunited once again in their fight for Filgaia. Downstairs, have Rudy talk to Vassim to receive his level 4 Force ability, Fury Shot. This incredible skill combines the Lock-on feature with tripling the attack power of the ARM.
Around the back of Vassim's Lab, have Rudy Bomb the large crate to pick up the Secret Tool item. We can't use this just yet, but will have its role a little later on.
Before continuing on, check Rudy's equipment. Give him his new Warrior Vest and Hyper Gear and I recommend switching his Heavens Rune for the Hades Rune. Also, now with his Fury Shot Force, swap the Force Unit over to Rudy and equip Jack with either the Gauntlet, Talisman, or Wise Slate. Lastly, solidify Cecilia with the Love Rune, and make your way back to the Forest Mound to return to present-day Filgaia.


