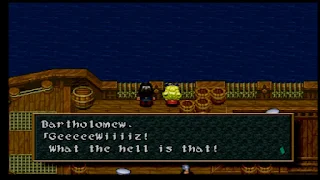
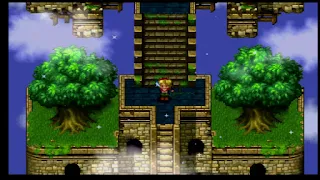
As you return from the present-day Forest Mound, you are met by Jane and McDullen, who are apparently more excited about Emma's new invention than the fact Rudy is okay now. You'll hoof it back to Adlehyde in time to see Bartholomew be used as a guinea pig pilot for Emma's new prototype. After he crash and burns, you'll hold a meeting in the Adlehyde Castle counsel room. Emma will bring in Anje, from Curan Abbey, to brief the party on the fact that her Guardian Stone is reacting and likely means that the Guardians are in trouble. Unfortunately, the location it is coming from cannot be reached by any conventional means.
Our only choice is we are going to have to upgrade the Gull Wing to be able to fly in the upper-atmosphere. To do so, we need two Gemini Circuits. The party will split into groups: Jane, McDullen, and Bartholomew will take the Sweet Candy to search, our trio will take the Protowing, and Emma will do nothing. The Protowing will then be available on the world map to use. It can fly, but not high enough to cross mountains, so it is fairly limited for the moment.
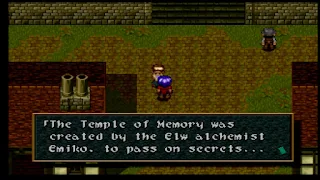
Back in Adlehyde, if you talk to the lady near the entrance to the castle, you'll see where you were originally suppose to get the password for the Memory Temple.
If you fly to Saint Centour and visit the little blind girl, she'll reveal that a strange swordsman has been visiting her lately and is very kind. Interesting. This will be important for a side-quest later on.
Our destination is the dungeon of Gemini's Corpse and it is located almost directly west of Court Seim, but you'll need the Protowing to wrap yourself around the mountain range to locate it. Outside the dungeon, you can encounter the Calupdis enemy. This is another excellent source of Gella revenue. The duo will net the party 10,000 Gella per battle and you can also steal Sorcery Wands from them to sell for an additional amount. Also, they will drop the rare Ambrosia item, but effecting them with Prison and then Lucky Shot can take some patience. Although I don't recommend it, you can sell the Ambrosias for another 7500 Gella.
Inside the Gemini's Corpse, walk around the first flight of stairs toward the back and Bomb the weakened wall. Open the treasure inside to have Jack learn a new fast draw, Cosmic Nova, this will also allow you to pick up another Guardian later on. Cosmic Nova is, essentially, a Magnum Fang-level attack on all enemies. Useful for random battles, but for bosses, I would stick with Magnum Fang. Now, take the stairs at the entrance of the dungeon.
A few notes on the encounters in Gemini's Corpse: the Valkyries are a huge pain, not only stealing your items, but near-impossible to hit with normal attacks. If you gave Rudy the Hades Rune and Force Unit, he can Guardian Summon to take them out quickly, or have Cecilia cast Hi-Blast. I wouldn't recommend Jack's skills, however, as he should conserve his MP for the boss. Then, mid-way through the dungeon, you'll encounter the large Hydras. Jack can steal Full Revives from them and they also will drop Nectars. The Iron Maiden is also here. I wonder if it knows the Black Sabbath?
At the bottom of the two sets of stairs, pass by the open door and have Rudy Bomb the wall right next to it. Inside, use Cecilia's Vase to extinguish the fires and take the Jewel item out of the sarcophagus. Return back out and follow the path east and through the door.
Bomb the noticeably-weakened wall to the upper left and take the stairs down to pluck another Jewel from a sarcophagus.
Back upstairs, pass the open door in the middle and use the door on the far-right. There are two treasures containing a Crest Graph and Black Pass. The Black Pass will be useful very soon, but for now, return and take the door you saw in the middle of the previous room.
Just down the stairs, use Hanpan to open the yellow chest to the left-side for a Magic Carrot, then you can Bomb, yet another, wall just before the southern exit.
Through the Bombed wall, put a Jewel into the sarcophagus to open the way to a previously-inaccessible ARMs box containing the Phaser. The Phaser is, in my opinion, Rudy's best all-around ARM. You will gain stronger ones, that will eventually surpass the Phaser when upgraded enough, but the Phaser remains consistent and reliable until the others are fully-upgraded. Back down the stairs, make sure to take the Jewel back from the sarcophagus, and exit to the south.
Here, use Cecilia to put out the nearby fire and have Hanpan open the chest for a Lucky Card; haven't seen one of those in a while. Insert a Jewel in the sarcophagus to open the stairwell going down.
Take the first exit you see and use Hanpan to access the chest containing the Pouch accessory. While not much use in battle, this one-of-a-kind item gives you a 25% chance to double the Gella you receive after battle. If you're farming for money, or a player that likes to maximize the amount of Gella you can carry, this is a great accessory to equip.
Starting in this area, the party will very rarely encounter the Duelgull monster. It's not worth noting other than for the rarity in which it is encountered and is only found within this dungeon.
From the Pouch treasure, take the first northern exit to a treasure containing a Mega Berry, then Bomb the wall behind it. Beyond, insert a Jewel into the sarcophagus to descend another stairwell. At the bottom, use the Vase to remove the flames and take both Jewels from the sarcophagus' on the left and right-side, then return up the stairs and take the Jewel out of the one you used to access the stairs.
Return back outside and use the northern path to the right. Take the first exit south, extinguish the flames with the Vase, and then put a Jewel in the sarcophagus to remove the bars from the nearby door. Back through the previous door, take the next southern exit to the right, put out the flames, and you can enter through the door that is now unbarred. The next southern exit leads to a useful save point, and then you can take the stairs to the east.
The stairs actually lead you to a pitfall, which the party will knock a chest off a nearby sarcophagus when they land. Inside the chest is the Power Glove tool for Rudy. You can use this to break and move certain objects.
In the following room, use the Punch Glove to knock the chests off the sarcophagus', then Hanpan to open them for a Duplicator and Ambrosia. There are cracked walls to Bomb behind both sarcophagus' that lead to Secret Sign treasures. When you have them, use the middle exit and Punch the purple Grapple post to the other side of the chasm; followed by Jack Grappling over. Enter the next room, equip Jack with a Thunder Ring, and attempt to take the Gemini Circuit to unleashed a boss.
On the first turn, have Rudy use a Lucky Card, Cecilia cast Protect on Rudy, and Jack use Phazer Zapp. With the Thunder Ring equipped, Phazer Zapp will do incredible damage. Follow up with Cecilia casting Protect on Jack, as well, and Rudy using Rocket Launcher, while all three character's build their Force to use Sonic Vision, High Guardian, and Fury Shot. The only real danger is your party being Silenced, but you can remedy that by equipping a Silver Harp, or using Mystic with a Violet Rose. Raftina, hopefully with High Guardian, should be all you need for healing. If Cecilia has a free turn, she should cast Hi-Spark or Armor Down.
When the battle is over, the party will acquire the first of two Gemini Circuits and a portal will appear to take you back top-side. Before we leave, for us item collectors, make sure to go back through the dungeon and collect the Jewels for your inventory; we should be able to leave with 4 of them. When you're done, fly back to Adlehyde with the Circuit.
Before we go to the castle, if you examine the bookshelf inside the item shop, but decline to read the book, it will say there is a slot to insert something. Use the Black Pass we picked up inside the Gemini's Corpse to slide the bookcase to the side revealing a staircase.
Downstairs is the Wild Arms series staple Black Market. This is the final store in the game and you should pick up all that is available. The armor, in particular, is excellent providing magic resistance boosts for Rudy and Jack. Since this is the last store, keep at least 180,000 Gella, but I recommend using what is left to upgrade Rudy's new Phaser. Cecilia's Lunatic Wand, when combined with Mystic, will cast Confusion, and her Garnet Coat can have Hi-Shield drawn out by it.
As you head towards Adlehyde Castle, the scene will shift back to the council room where the party will deliver the Gemini Circuit. A messenger will come in that the Sweet Candy group has also recovered the second Circuit, but as quickly as this messenger arrives, another delivers the news that the Sweet Candy is under attack. A "stone mermaid" will then destroy the Sweet Candy and the Gemini Circuit is lost to the bottom of the sea, but thankfully, Jane and the others are able to escape...If you'll recall back at the Demon's Lab, one of the terminals said that the demons had released a golem into the ocean. A downtrodden Bartholomew and Jane will return with the unfortunate news, but surely there is a way to locate the missing Circuit?
Fly to the Ship Graveyard and you will, conveniently, find the second Gemini Circuit washed up on the beach. Return the pair to Emma inside her house in Adlehyde and she, along with the ARMs meisters from around the world, will burn the midnight oil powering up the Protowing into the Gull Wing; now able to fly anywhere in the world. As expected, the Sweet Candy is now gone, but don't worry if you missed anything that needs it, we will have it repaired soon enough.
With the Gull Wing in our possession, fly to the Giant's Cradle, which is northeast of Adlehyde. Directly to the west of the dungeon, there will be a small valley surrounded by mountains. Land and search the area to the west to find the hidden "Ancient Altar". Here, if Jack picked up the Cosmic Nova fast draw from Gemini's Corpse, the Guardian will bless you with the Sword Rune. I would recommend switching this to Jack over the Life Rune, however, having Jack as an emergency healer is also nice, so you decide for yourself. When summoned, the Sword Rune does heavy, non-elemental damage.
Before going on to our next story dungeon, I recommend taking on the first of two optional dungeons in the game. To find it, all you need do is fly directly north from Curan Abbey and you will see the Heaven Corridor.
To enter the Heaven Corridor, you'll need a Duplicator. In fact, you'll need three Duplicators to open all the doors inside, but you should have six Duplicators in your inventory at the moment. Once inside the structure, climb the ladder and have Cecilia use her Tear Drop to be teleported to the top of the dungeon. This place will remind you a lot of the Pleasing Garden earlier in the game. If you need to leave, you can jump off the backside to return to the entrance. A few notes on the monsters inside the Heaven Corridor: Jack can steal Flame Rings from the Garums, Wind Rings from Kaims, and Gnomes can drop Nectars.
Once you teleport top-side, climb the ladder to the north, then take the path north, but turn to the left for another Duplicator door. Inside are two treasure chests containing Crest Graphs. Back outside, climb the ladder to the northeast.
There's a bookcase you can examine here, but we need to find the hidden switch inside the top-right urn. Once activated, it opens a sealed door on the west-side of the dungeon.
Climb back down the ladder and south towards the one you climbed to reach this section, take the western path this time around, but before climbing the ladder, there is a semi-hidden chest nearby with a Magic Carrot inside. After ascending the ladder, you'll find the unsealed door, and past it, in certain places, there are hidden wards placed on the ground and if your character steps on one, you are teleported back to the entrance of the dungeon. In the first room, hug the wall to the left-side, past the bookcases you can read, and north through the door to avoid the ward.
Outside, you can grab a Nectar in a chest to the south before climbing the ladder. Open the door with another Duplicator and in the room following, again, hug either the left or right-side walls to avoid the ward.
In this horizontal room, while heading east, you'll see two treasure chests on the bottom-half of the screen, but they have wards placed in front, so you'll need to use Hanpan to bypass them to take the Crest Graphs inside. There's also a save point to the north, which is free of wards. Continue east until you see a broken pillar in the middle of the path. There is a ward placed to the upper-left of the pillar, so go around the pillar to the south, then north and climb the ladder.
Now for the frustrating part...In the next three rooms, you need to catch the crystal which mimics your every move. Honestly, I have no idea how this is suppose to work. Nothing will help you; not even Rudy's Skates. Even consulting with others, there seems to be no rhyme or reason how to do this properly. I wish I could tell you more, but it seems to most everybody, that dashing randomly back and forth around the area confuses the crystal enough to leave it in one spot allowing you to grab it. If anybody has specifics on how to do this, please feel free to contact me. Again, I apologize for not being able to help more than this, just try to be persistent and dash around randomly to confuse the crystal.
After the third puzzle room, climb the stairs and stand in the center of the platform that is between the two trees and have Cecilia use the Tear Drop. The great magician, Dhee, will appear and bestow the level 4 Force ability, Dual Cast, upon her. Unless you have an enemy weak against a specific element and can cast it twice, I wouldn't bother with this when you have High Summon. Also, if you have played Wild Arms 2, this doesn't act like Lilka's and you can combine two spells to possibly create another; Cecilia's is the same two spells back-to-back regardless of the ones that are chosen.
Once you have the new Force ability, cast Escape and return to Adlehyde to make use of our new Crest Graphs. There should be five in your inventory. I'm selecting: Life Drain (Black: Geo-Wing), that deals damage and restores Cecilia's HP. Eraser (Black: Geo-Fray), that nulls any element strengths or weaknesses of all enemies. Hi-Reflect (White: Wing-Geo), that casts Reflect on the entire party. Anti Magic (White: Fray-Muse), that negates all types of magic for both enemies and allies,
however, only the spells Cecilia can learn, and not enemy-specific
attacks. Dummy Doll (White: Wing-Fray), that will defend a character from a couple of physical attacks, but only basic attacks; any named attack will not be guarded. A lesser-known use for Dummy Doll is it can actually prevent a character from counterattacking. This can be useful for those enemies that are difficult to steal from or setting up one to be finished with Lucky Shot. With those in hand, we only have two more spells left to learn to complete Cecilia's magic.
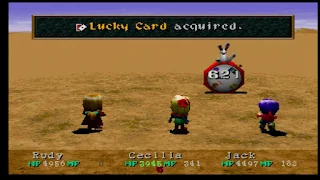
One final thing I want to cover before the chapter closes. In the next dungeon, we will be facing-off against three bosses, so I would recommend picking up some additional Lucky Cards for them. With the Gull Wing now, we can access the large desert, known as the Sea of Sand, northwest from Adlehyde, just over the mountains behind the Memory Temple. This is the scar Vassim made on Filgaia originally with the Guardian Blade. There are numerous, powerful monsters here in the southern portion (Just over the Memory Temple) half of the desert I will cover a little later on, but for now, just look for the Acid Bunnies. Be VERY careful, though, and only stick to the terrain nearest the Memory Temple; there is an optional boss here that randomly will appear under the character in the desert and he is likely to overwhelm your party at the moment. Jack can steal Lucky Cards from the Acid Bunnies, but they are fast and prone to escape. I recommend giving Jack the Force Unit so he can use Accelerator after the first turn. You can also attempt to cast Hi-Prison with Cecilia to trap one and prevent it from running. Then, the following turn, you can Lucky Shot it and they will drop an Agile Apple. If you can get them to stick around, the Lucky Cards are fairly easy to steal and you will receive a ridiculous amount of EXP, as well.
If this method proves to be too difficult, you can also win, then quit, after the very first round at the Ancient Arena to obtain a Lucky Card. While the extra Lucky Cards are far from necessary, the extra EXP from the upcoming bosses can prove helpful as we inch closer to the game's finale. When you're finished, make sure to rest, save, and refill Rudy's ARMs before leaving for our next dungeon. It's going to be a long one.


