

The party arrives at the University Town of Sybak, but Presea seems less than thrilled about being here. I think it's the music, cause it drives me crazy, too, Presea. Note: I won't be covering Zelos' "hunnies" yet, because half the town is soon to be closed off to us, but we will backtrack later for it. For those looking: there's no Keele cameo!
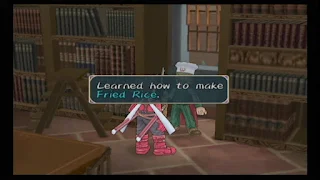
Enter the large building to the north of the town which happens to be a gigantic academic library. To the upper-middle-right of the room, near a window, is a fanzine-looking thing that summons the Wonder Chef. He teaches us the recipe Fried Rice, this time, that recovers HP and TP for everyone.


Exiting to the southwest takes you outside the Imperial Research Academy. Inside, a scientist has been awaiting Zelos and his group and they retire to another room to discuss Colette's condition. The Cruxis Crystal Remiel originally attached to Colette, much like an Exsphere, works similarly to a parasite; it feeds off of the host, slowly fusing with them. Fortunately, a Key Crest can be placed upon it, same as an Exsphere, to stop this process that eventually ends in the victim turning into a monster like Marble and Clara. If we can find one around somewhere, Lloyd thinks he can attach it to Colette's Cruxis Crystal and stop the parasitical infection. At the close of the meeting, Colette gains the Ill-fated Girl title (HP, Str: 30%).

There are many rooms in the large Academy, but there's little to do at the moment. Use the exit to the right of the long hall to return to the Academy's hall, then enter the door to the back of the giant dragon skeleton to find the cafeteria. There are two different grocer shops here depending on whom you talk with, that sell a vast majority of the food items in the game. You also only have temporary access to these shops until later on, so I recommend you buy all you can afford right now.


Move Lloyd back to the Academy's main hall to find your party gathered. Having finally finished Colette's birthday present with the Key Crest, he places it on her Cruxis Crystal, but it appears to have no effect...Crestfallen, the group wonders if perhaps Dirk can make a suitable Key Crest for her, and the subject of returning to Sylvarant is discussed with Zelos. Suddenly, however, the spying Papal Knights come charging in and accuse Zelos of conspiring with the others to bring about Tethe'alla's decline! Everyone is arrested and subjected to a biological test; a product of Tethe'alla's caste system. The test reveals that Raine and Genis are, in fact, half-elves, and not full-blooded ones! Half-elves, the lowest on the cast system, having committed a crime, are immediately subject to death and the Papal Knights march them away to Meltokio with Lloyd and the rest of the group locked up in the basement.

In the basement of the Academy, the group meets another half-elf named Kate. She recognizes Presea as the subject of her Cruxis Crystal experiments. So, this was the reason Presea hates Sybak, and not the music after all. This infuriates Lloyd; it being no different than how the Desians create Exspheres. Kate suggests that this research is actually no different than how the people of Tethe'alla treat half-elves. Corrine and Sheena then smoke into the scene and assure Kate that Lloyd and his group are different, but right now, Genis and Raine are being taken away to be executed and we have to save them. Kate is reluctant to help them escape, but Lloyd promises he will return here with her half-elven brethren rescued. If his heart is as pure as he says, Kate will free Presea from the Cruxis Crystal experiments, as well. She then shows the party a way out through a manhole and gives you the Tethe'alla Map item.

Sheena having rejoined the party, a few new skits are available: "Curiosity Towards the Unknown" and "Sheena's Spell". You're barred from entering the Academy again for a while, so hopefully you stocked up on food items when you had your chance. Back out on the world map, you'll see that the residents were correct in that there are new monsters on the world map, but since Raine is currently absent, we will cover them later. Cross the Tethe'alla Bridge once again, looking for the skit "Hurry Along the Tethe'alla Bridge" to occur. Near the end, the Papal Knights will begin to raise the bridge up, resulting in Lloyd and company doing a heroic jump in an attempt to bridge the gap. Unfortunately, they miss by a wide margin, but Sheena's summoning of Undine saves and propels them to the other side. Colette, in self-preservation mode, simply glides over to the other end without a care in the world.

To save Raine and Genis, you'll have to battle three, fairly easy Cardinal Knights. Don't bother with a Magic Lens since we'll encounter these guys later with Raine available. Zelos can easily devastate them by casting Thunder Blade, if you want a quick battle. Everyone reunited now, the plan is for Sheena to form a pact with the Summon Spirit, Volt, to return to Sylvarant with the Rheairds. Before we can do that, though, we need to go back to the Fooji Mountains and retrive them. How? Zelos has an idea, I guess. Out on the world map, look for new skits: "Half-elves in Tethe'alla" and "You Changed, Too". Return to Meltokio to find that, not surprisingly, Zelos is now a wanted man. There will be a small scene and one of the guards can sell you basic items.
With Sheena, Genis, and Raine back, we can acquire a new title. Form a party of Raine, Colette, Sheena, and Presea and complete a battle. All female members participating in a battle rewards Raine with the Crimson Rose title (Int, Eva: 40%).
New Monsters in the Meltokio area: Sorceress (Roads)

New Monsters in the Fooji Mountains: Chimaera, Demon

All of the Fooji Mountains monsters have changed. Zombies, Ghosts, and even old Slimes are here now, along with two new creatures: the Chimaera and Demon; both of which have rare items. Note: All of the former Fooji Mountains monsters are still found out on the world map in the Meltokio area. The Demons occasionally drop the Brass customization item and many will be needed for future customizations; although we will encounter another monster later that carries them, too.


We already talked about the Rune Bottle's transformation of the Sephira accessory to the Blue Sephira, but let's cover a few more options. Go ahead and use one on the single Talisman accessory you have to turn it into a Blue Talisman. The Blue Talisman increases your Defense by 15%, and other than customizing for one late in the game, this is your only way to obtain it. We will be able to purchase basic Talismans later. Additionally, you can use Rune Bottles to transfer the Energy Tablets from Zelos' philandering to Spirit Bottles that recovery party TP. These are extremely rare until the final dungeon of the game. Lastly, the Saffron, Sage, ect. statistical items can be improved to "Red" versions that double their effectiveness!
Since our group is all back together after Sybak and the Bridge, a quick update on the equipment I am currently using for my party:
- Lloyd: Kotetsu, Splint Mail, Cleric's Hat, Claw Gauntlet, Blue Sephira/Magic Mist, Spirit Bangle
- Colette: Mythril Ring, Elven Protector, Tartan Ribbon, Bridal Gloves/Lapis Bracelet, Rabbit's Foot, Guardian Symbol
- Genis: Cool Orbit, Druid's Cloak, Pointed Hat/Cleric's Hat, Lapis Bracelet, Blue Talisman, Leather Boots
- Raine: Gale Staff, Misty Robe, Gold Circlet, Lapis Bracelet, Yata Mirror, Leather Boots
- Sheena: Card of Fire, Misty Robe, Tartan Ribbon, Bridal Gloves/Lapis Bracelet, Black Onyx, Warrior Symbol
- Zelos: Aqua Brand, Splint Mail, Cleric's Hat, Omega Shield, Rabbit's Foot, Leather Boots
- Presea: Battle Ax, Elven Protector, Tartan Ribbon, Claw Gauntlet, Holy Ring, Leather Boots


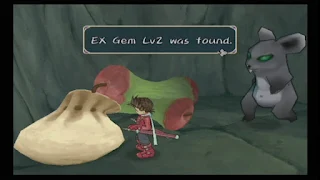
Of course, Pronyma isn't going back to Yggdrasill empty-handed. Pronyma is weak against light, so we'll be using that to our advantage. You might be tempted to use your solitary White Quartz, but don't! They are way too rare to waste. Instead, depend on Raine casting Photon or Ray/Holy Lance, and Colette using Angel Feathers after Holy Song. When your Unison Attack gauge is full, perform a light elemental combination with Raine's Photon such as Psi/Omega Tempest (Lloyd), Whirlwind Rush (Colette), or Lightning Blade (Zelos) for major damage. Pronyma uses magic almost exclusively, so be prepared to activate a Guardian tech against Aqua Laser and Bloody Lance, particularly. You can jump over the former, but your timing would need to be impeccable. They key to winning, of course, is to keep her off-balance and unable to conjure magic with Lloyd and Zelos while the ladies bombard with light magic. Keep a close eye on the casting of Acid Rain, also, and immediately have Raine follow up with Nullify or Dispel afterward to keep your party from the lowered defense it induces. When the Grand Cardinal is defeated, she leaves a Rosemary and EX Gem Lv2.


At the conclusion of the battle, Kratos appears in some nice, new threads and stops Lloyd from attacking Yuan and orders the Renegade back to Yggdrasill. He says that the group is wasting their time in trying to save Colette, but challenges Lloyd to make good on his assertion that he can change Yggrasill's vision for the world he created. Kratos and Pronyma having left, the party turns to Colette, who has finally regained all of the senses she lost during the regeneration journey! She still manages to retain her angel powers, though. With Colette full of life now, the party turns their efforts toward a new goal: to save both Sylvarant and Tethe'alla and prevent the need for any more Chosens. We need to find a way back to Sybak, and to return Presea to her home in Ozette, so Zelos suggests, despite being wanted, we try Meltokio.

New Monsters in the Meltokio Sewers: Sewer Rat, Sewer Rat (Large), Giant Leech, Violent Viper, Jellyfish

The new monsters within Meltokio's sewer system are packed with poison, so make sure your Omelet recipe is handy or equip some Poison Charms for the duration of the dungeon. Usually found in the second screen of the sewers, the Jellyfish, in my opinion, is the best place in the game to obtain basic Pellets. Not only can Colette swipe them, but they also have a chance to drop, along with Fine Pellets, as well. This will be a key area for completing your Figurine Book later on.

In shrunken size, navigate the small pathway along the wall just south of the altar and enter the hole in the wall. Rob the giant Sewer Rat's bag for an EX Gem Lv2.

Note: I wanted to drop a quick note since, for any new players, this likely will be your first EX Gem Lv3. Zelos and Kratos have a Lv3 EX Skill called Slasher that is very nice if you are in control of them, however, I highly advise against equipping this skill for the AI. Since Slasher disables your ability to chain techs after hit number four, the AI simply won't use techs at all and just attack with the six-hit Slasher combo constantly.


Create a trash block via the levers on the left-side of the compactor and push it over the side of the ledge in the screenshot above. It will fall next to a reddish wheel below.


Descend the stairs you previously passed on the way to the sealed door and search around behind them for a semi-hidden chest with a Spirit Ring accessory within. When equipped, it restores 1% of a character's max TP at intervals during battle. I gave this to Genis over his current Leather Boots accessory.


Through the newly-opened door, move left and down the stairs; shrink, and jump into the wooden crate. It will carry you back to the previous area, but a trash cube you dropped will stop the crate near the red wheel. Spin it to open a door to the right-side of the trash compactor above.


Return to the room where you jumped into the wooden crate, with the save point, and use the stairs downward to the right-side. Search near the blue tile for a treasure chest containing a Breastplate armor for either Lloyd or Zelos.


Using the newly-formed web, position yourself and a trash block in the above position. Again, push this block directly eastward and off the ledge. It'll land just outside the cage you opened. Go back below and push the cube into the cage and onto a pressure plate in the center to activate a bridge on the left-side of the room. Ignore the bridge and return to the second trash compactor room to find a fresh, new web.


The cube's position is up the stairs, to the upper-right of the cage. There's another rat hole along the wall, devoid of any monstrous Sewer Rats this time, where you can freely plunder an Ex Gem Lv1.


With the bridge out, you'll have to use the path below the stairs. Just after the three blue tiles, between two pillars, is another hole in the wall. This time, a bag contains the Thunderbolt weapon for Genis. It's another unique weapon like Presea's Great Ax.


So, some really malnourished-looking guys with clubs (Convicts) are going to show up and try to kill you. They're pushovers, but make sure Raine uses a Magic Lens on them since they are a one-time battle.


The chest on the opposite end of the broken bridge is another Fake, just like the one from the Triet Ruins. Prepare according bringing Colette to steal an All-Divide and use magic to destroy it. You'll pick up an Elixir afterward; an extremely rare recovery item.


To the north of the inn, before you reach the exit to the slums, is the Elemental Research Laboratory; our destination. A fellow "ninja" from Mizuho, Kuchinawa, who is childhood friends with Sheena, meets the party at the front desk. The workers downstairs have the idea that the group cross the ocean in something known as an Elemental Cargo. Powered by Expheres, it is normally used on land, but with Sheena utilizing the power of Undine, it can be used as a watercraft, apparently. It will take a day to get ready, so Zelos invites you to stay the night at his mansion.

After a brief discussion on the Exspheres being used to operate the Bridge, the party can find Kuchinawa with the Elemental Cargo already at the dock below. The Sylvarant group; sans Raine due to the fear of going out on the thing, are fascinated by the Wing Pack's ability to bring the EC in and out of use! Kuchinawa gives Sheena a "special" charm, the Kuchinawa's Charm item, and she calls forth Undine to set the EC to sail. Don't get too excited though: there's nowhere to go besides the dock on the Sybak shore directly to the north. Look for new skits "Two Chosens" and "Cute Ribbon", also.
For the most part, the monsters around Sybak are largely the same as Meltokio, however, depending on your positioning, you can encounter a couple of new ones. These will be covered in the areas just beyond the Gaoracchia Forest; our next dungeon, so for the time being, enter Sybak.

The group runs into Kratos leaving upon their entry to the academic town. He easily parries a headstrong Lloyd's attack, then exits with a message that Colette should remove her Key Crest if she wishes to continue living.


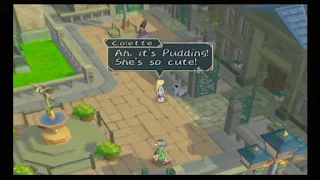
Outside the Imperial Research Academy, by the water's edge, is another stray for Collete, Turbie. You still can't enter the Academy, so use the manhole to talk to Kate.

