

Inside the Toize Valley Mine, the Papal Knight's tampering has caused the Defense System to malfunction and the only way inside is through it. Don't be intimidated by the size and number of enemies; it is a really simple boss battle. First off, make sure Raine distributes Magic Lens around to the Defense System, Orbit, and Auto Repair Unit; the Guard Arm cannot be targeted and dies with the Defense System so it is automatically added to the Monster List. Have everyone target the Repair Unit first, then focus on the Orbits, which are, basically, just Raybits. With those three gone, the rest of your characters will gang up on the Defense Unit itself for big combos. It'll try to send out the Guard Arms to damage you, but it's doubtful to be any serious threat before you deplete the Defense System's HP. Note, however, that a Unite Attack will not work on the Defense System, so use your gauge on one of the other pieces. When the Defense System falls, you'll obtain a Metal Sphere and four pieces of Mythril.
New Monsters within the Toize Valley Mine: Red Bat, Rock Golem, Red Roper, Basilisk, Roller Snail, Bacura


Form a party of Lloyd, Colette, Genis, and Sheena. Control Lloyd and make use of his Raining Tiger Blade for the maximum amount of hits; or, if you're high enough level, and on the Technical side of the T/S line, Sword Rain: Beta will work, as well. Set Colette's Torrential Para Ball or Hammer Rain to one of Lloyd's C-button shortcuts, and Genis' Cyclone/Ground Dasher or Thunder Arrow to the other. Continuously perform the above techs, over and over, with Sheena, hopefully, chipping in with her usual high combo count and using Pineapple Gels when needed. You need speed, efficiently, and a bit of luck to defeat it in time. If you do manage to defeat it, you'll get 1000 Gald and 5 Grade. Some like to use this to farm Grade, but I think it's a bit unreliable. When you can return to Sylvarant, quick battles in the Iselia Forest provide more Grade in a timely manner, in my opinion, but you decide which works best for you.

Onto the dungeon, look for new skits "Mine from Ancient Times" and "Machines That Are Still Alive" and return back to the entrance room. To the upper-right is a treasure with a Sage to procure, then to the lower-left, between the two abandoned mining carts, is a semi-hidden one containing a EX Gem Lv1.


Descending the piston-driven elevator, to the right-side, there's a hidden treasure at the back of the mine carts with a Crescent Ax for missing Presea. This weapon is unique, so don't sell or customize with it! At the lower-right-end is a Sorcerer's Ring altar that transforms the effect into a bomb of pure mana. This activates the skit "Bomber Ring" and allows us to advance further in the dungeon. Don't let it detonate near you, however, because it deals damage to the entire party.


Back to the eastern-side of the Mine, destroy the boulder to access a new area. A skit will occur here called "I'm Tired of Mines". Search around in the alcove to the left of the slime-looking monster icon to find Iron Greaves for Regal; another unique weapon. Note: None of the control panels in this area do anything, so you can just ignore them.


In the same section as the Silk Robe, you'll see a tiny, rather rude, Gnomelette running about. Number 1 in the series, apparently. The little squirt demands the group of "losers" provide him a Potion to eat. Give him either a Palma or Mizuho Potion and he'll devour the entire thing and run home. This is actually required to advance the story later on, so make sure you get him one, despite the bruised ego.


Go back and use the piston elevator located before the boulder trap to go down to the level where the Bacura remains are. There are two treasures here for a Thunder Cape accessory and Super Pellets. The Thunder Cape is a fairly rare accessory, boosting both Def and Eva, while providing protection from wind and lightning elements. I traded this out with Zelos' Water Spider, personally. Then, search the fragmented remains of the Bacura to obtain our first Devil's Arms weapon, Colette's Evil Eye. It's useless until much later in the game, but don't miss it! We need it for a scene.


With the Inhibitor Ore in our hands, it's time to backtrack out of the dungeon. At the exit, the party encounters Vharley, an Exsphere broker, who, if you'll recall, was talking to Presea in Meltokio. Vharley knows Regal, too, and accuses him of siding with Lloyd's group over the Pope, but it doesn't matter; the Pope was never going to let a "murderer" like Regal go free even if he captured Colette. The smug villain departs and the group wonders if Regal really did commit murder. Regal confirms it is true, but refuses to elaborate any further; leaving his story for another time. Afterward, the skit "You and I are..." between Genis and Regal is available. Return to the EC and head back to Ozette with Raine if your party for Monster List purposes.
Note: If curious, we can access a few other areas with the Elemental Cargo, but there is absolutely nothing to find at any of these places currently. Also, we're about to lose Colette for a length of time, so adjust her title for out-of-party levels accordingly.

You find that the Papal Knights have been waiting for you in Ozette. Make sure Raine uses a Magic Lens on the Commander Knight, for sure, and the Cardinal Knight if you haven't in a previous battle. This is your last chance to do so; we'll fight them again one more time, but Raine will not be available. All of the Knights are still weak against lightning, if you want to make short work out of them.


The party helps Presea to bury her father outside the house. She explains that Vharley was the one that gave her the Exsphere and the experiments began, under the guise of Rodyle and the Pope, in Sybak. Both Presea and Regal ask Lloyd to go with him to rescue Colette from Rodyle. Lloyd can respond either: "Of course." for slight affection increases for Genis, Raine, Sheena, and Zelos, but large ones for Presea and Regal or "What do you think, guys?" for small boosts for Regal and Presea, but large ones for Genis, Raine, and Zelos. Either choice, Kratos makes his presence known. Rodyle has begun to act outside the wishes of Yggdrasill. He doesn't care what happens to Colette, but suggests Lloyd find the Rheairds and head for the eastern skies if he wants to help her, then departs. You're given the option to do a quick jump to Mizuho, but decline. Note: Equip Presea with the Crescent Ax you recently found and a Pretty Ribbon.


Exit out of Ozette and over to Altessa's House. Talk to Tabatha and she'll teach the party another new recipe, Curry. Believe it or not, this is a required part of the story later. Curry recovers a moderate amount of both HP and TP for the party.


You can talk to your party members around the small hamlet, but it has no bearing on affection values. Sheena is in the northwest of the village, by the Jizuo statues. She's terrified of the past repeating, but both Corrine and Lloyd promise to protect her if things go wrong this time, which eases some of her fears and the party regroups to make the journey to the Temple of Lightning. After the scene, look for the skit "Sheena's Real Name" and on the world map, "Pact with Volt". Make your way to the EC pier near Ozette and sail directly north to the small island the Temple is located on. There are no new monsters on the island, so go ahead and enter the dungeon.

New Monsters in the Temple of Lightning: Lightning Bird, Gold Slime, Thunder Sword, Gold Skeleton, Lamia

Upon entering, look for new skits "Do Your Best!" and "Beautiful Mutual Trust" to occur, then move straight forward, climbing the stairs, and step on the button in front of the lightning rod for a scene. Coming in contact with lightning, of course, causes HP damage to the entire party. Use the stairs to the right and activate the lightning rod there to draw the strikes from the middle one; then return to the middle rod and bring it down. Finally, return to the right-sided rod and disable it. Step on the middle button one more time for lightning to strike the left-sided rod that sents out a spark destroying the block allowing you to access the Sorcerer's Ring altar.


Using either flight of stairs to the east or west, ascend to the top to discover an altar with three different-colored blocks stacked on top of each other. Use the blue lightning to destroy the bottom block, then, back down the stairs, destroy the block in front of the center door to advance inward.


Destroy the dangling blue block here, to the left-side this time, and raise the spire to reach the next level. The chest contains a Duel Helm for Lloyd or Zelos. Since Zelos is using the Omega Shield, I decided to give him the Duel Helm over the Cleric's Hat.


You're in another dark, lightning-lit room, but there's a treasure chest hidden here. After descending the second set of stairs, use the path to the right, that leads under the walkway you just passed over, and search for a Spirit Bottle item. Once you have it, deliberately fall off the side to easily reach the lower levels.


Back out to the first room of the Temple, use the yellow lightning effect to destroy the blocks to the lower-left and nab the Shining Star weapon for Genis.


The puzzle involving the machine on the top floor can be a bit frustrating if you're unsure of how it works. Basically, starting from the point of the machine itself, it sends out a surge of electricity through the rods that extend upward; the destination is determined by the yellow bricks that hold up conduits connecting the electricity to the next rod. If you destroy the blocks, the conduit is also lost, and the electricity cannot pass through to the rod next to it. So, we have to strategize what blocks to destroy to force the electricity to flow to the top of the rod we want it to.


Using the screenshot, set the puzzle up like so, then activate the machine. The surge of electricity will trigger a boulder trap to fall from above, destroying the bridge down below, but allowing us a way to access the lower area. Any of the other puzzle options result in a monster dropping down on your party or them being hit with a lightning strike. Using the broken bridge to move below, grab the Battle Cloak armor for Regal, that is in the chest that dropped down previously, and enter the door at the bottom of the room. Use the Sorcerer's Ring altar to be able to create red lightning.


Make sure to go back and save before preceding to the central altar and destroying the final red block at the top. I highly recommend bringing a party of Lloyd, Raine, Genis, and Sheena and suggest equipping the Thunder Cape and Paralysis Charm accessories to add additional lightning protection for the upcoming boss, also. Lloyd or Regal cooking Meat Stew in preparation is not a bad idea, either.
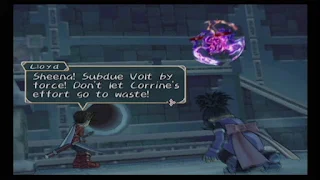
After removing the three colored blocks, extend the spire to draw out the Summon Spirit, Volt. It speaks an unknown language, but thankfully, Raine can translate for Sheena. Volt had a pact with Mithos, just like the Summon Spirits in Sylvarant did, but it's long since been broken. It's not interested in forging a new pact, either, due to lost faith in humanity. Sheena draws her cards for battle anyway in insistence, but Volt sends the entire party scattering with lightning strikes. Volt goes to attack a stunned Sheena, but Corrine jumps in the path of the lightning; protecting her. Lloyd continues to shield Sheena from Volt's aggression while she says goodbye to her Spirit friend. It looks as if Volt is only going to listen to a show of force.

Be mindful in using your Guardian skills; even manually ordering your characters to use them to defend from Volt's magic. This is particularly useful for any melee fighter about to be caught in his close-range, Indignation spell. You can anticipate it by watching for the blue ring underneath him, ordering the Guardian skill, and attempting to backstep out of range with your controlled character. Lloyd can use his Tempest and Tiger Blade series of techs to maximum advantage here, and like always, knowing when to combo and defend is your greatest key to victory. For winning, Volt coughs up an Emerald Ring accessory that cuts a character's TP consumption by 1/3. Excellent! Swap this out with Lloyd's Spirit Bangle when you have the opportunity.

Defeated, Volt speaks for Sheena to make her vow, and on Corrine's sacrifice, she does. Undine appears out of the blue and proclaims that a mana link between Sylvarant and Tethe'alla has been severed. Neither Undine or Volt knows for sure what this means for the future, but it appears inevitable that the two worlds will be split apart if all of the mana links are broken. The party wonders if perhaps this is the way we can save both Sylvarant and Tethe'alla from Yggdrasill's endless cycle.
You then receive the Corrine's Bell item and unique Sardonyx accessory. It provides protection against lighting attacks and unending thunder element to your attack. You can use this to continuously activate Lloyd's Lightning Thrust and Tiger techs, also. Sheena gains the techs T. Seal: Lightning, that imbues temporary lightning element to a character's attack, and Summon: Lightning. Used in Overlimit mode, Volt blasts everything around his summon point with lightning for huge damage and gives the party temporary immunity to physical status effects. Sheena also is credited with the new title of Summoner (Int: 30%, TP:10%).
